


방문해 주셔서 감사합니다.
안녕하세요. input태그로 선택한 파일의 목록을 보는 방법에 대해서 알아보겠습니다.
files를 사용하면 선택한 파일을 목록을 볼 수 있습니다.
$('selector').files;
자 그럼 우선 파일선택폼을 만들어보겠습니다. php의 다중 파일 업로드 강의에서 사용한 코드를 참조해서 사용할게요.
<!DOCTYPE html>
<html>
<head>
<meta charset="utf-8" />
<title>everdevel - jQuery 선택한 파일 목록보기</title>
</head>
<body>
    <form method="post" action="upload-multiple.php" enctype="multipart/form-data">
        <input type="file" id="fileUpload" name="upload[]" multiple>
        <ul id="fileList"></ul>
        <input type="submit" value="send">
    </form>
</body>
</html>
결과는 바로 아래에서 확인하겠습니다.
갑작스레 파일업로드라니 당황스러울 수 있어요. 하지만 PHP는 다루지 않으지 걱정하지 마시길...
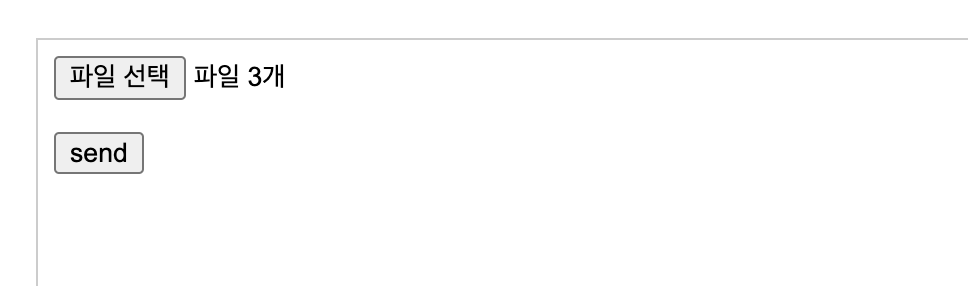
위의 코드를 실행하고 여러개의 파일을 선택해 보세요.
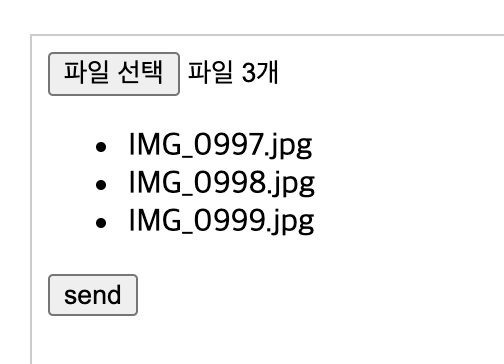
저는 3개의 파일을 선택했습니다.
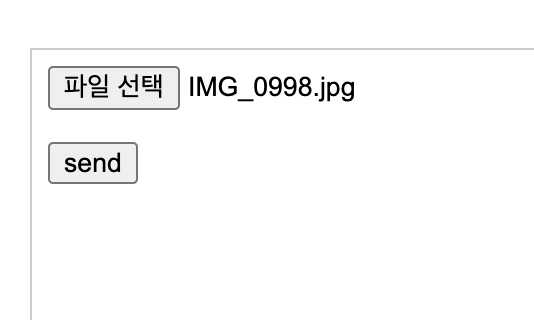
파일을 1개만 선택하면 다음과 같이 파일명이 표시됩니다.
우리는 선택한 파일의 파일명이 표시되게끔 할거에요.
표시할 태그를 하나 만들게요. 만들태그는 다음과 같습니다.
<ul id="fileList"></ul>
그리고 input 태그의 값이 바뀔때마다 이벤트를 발생시킬게요. 사용할 코드는 다음과 같아요.
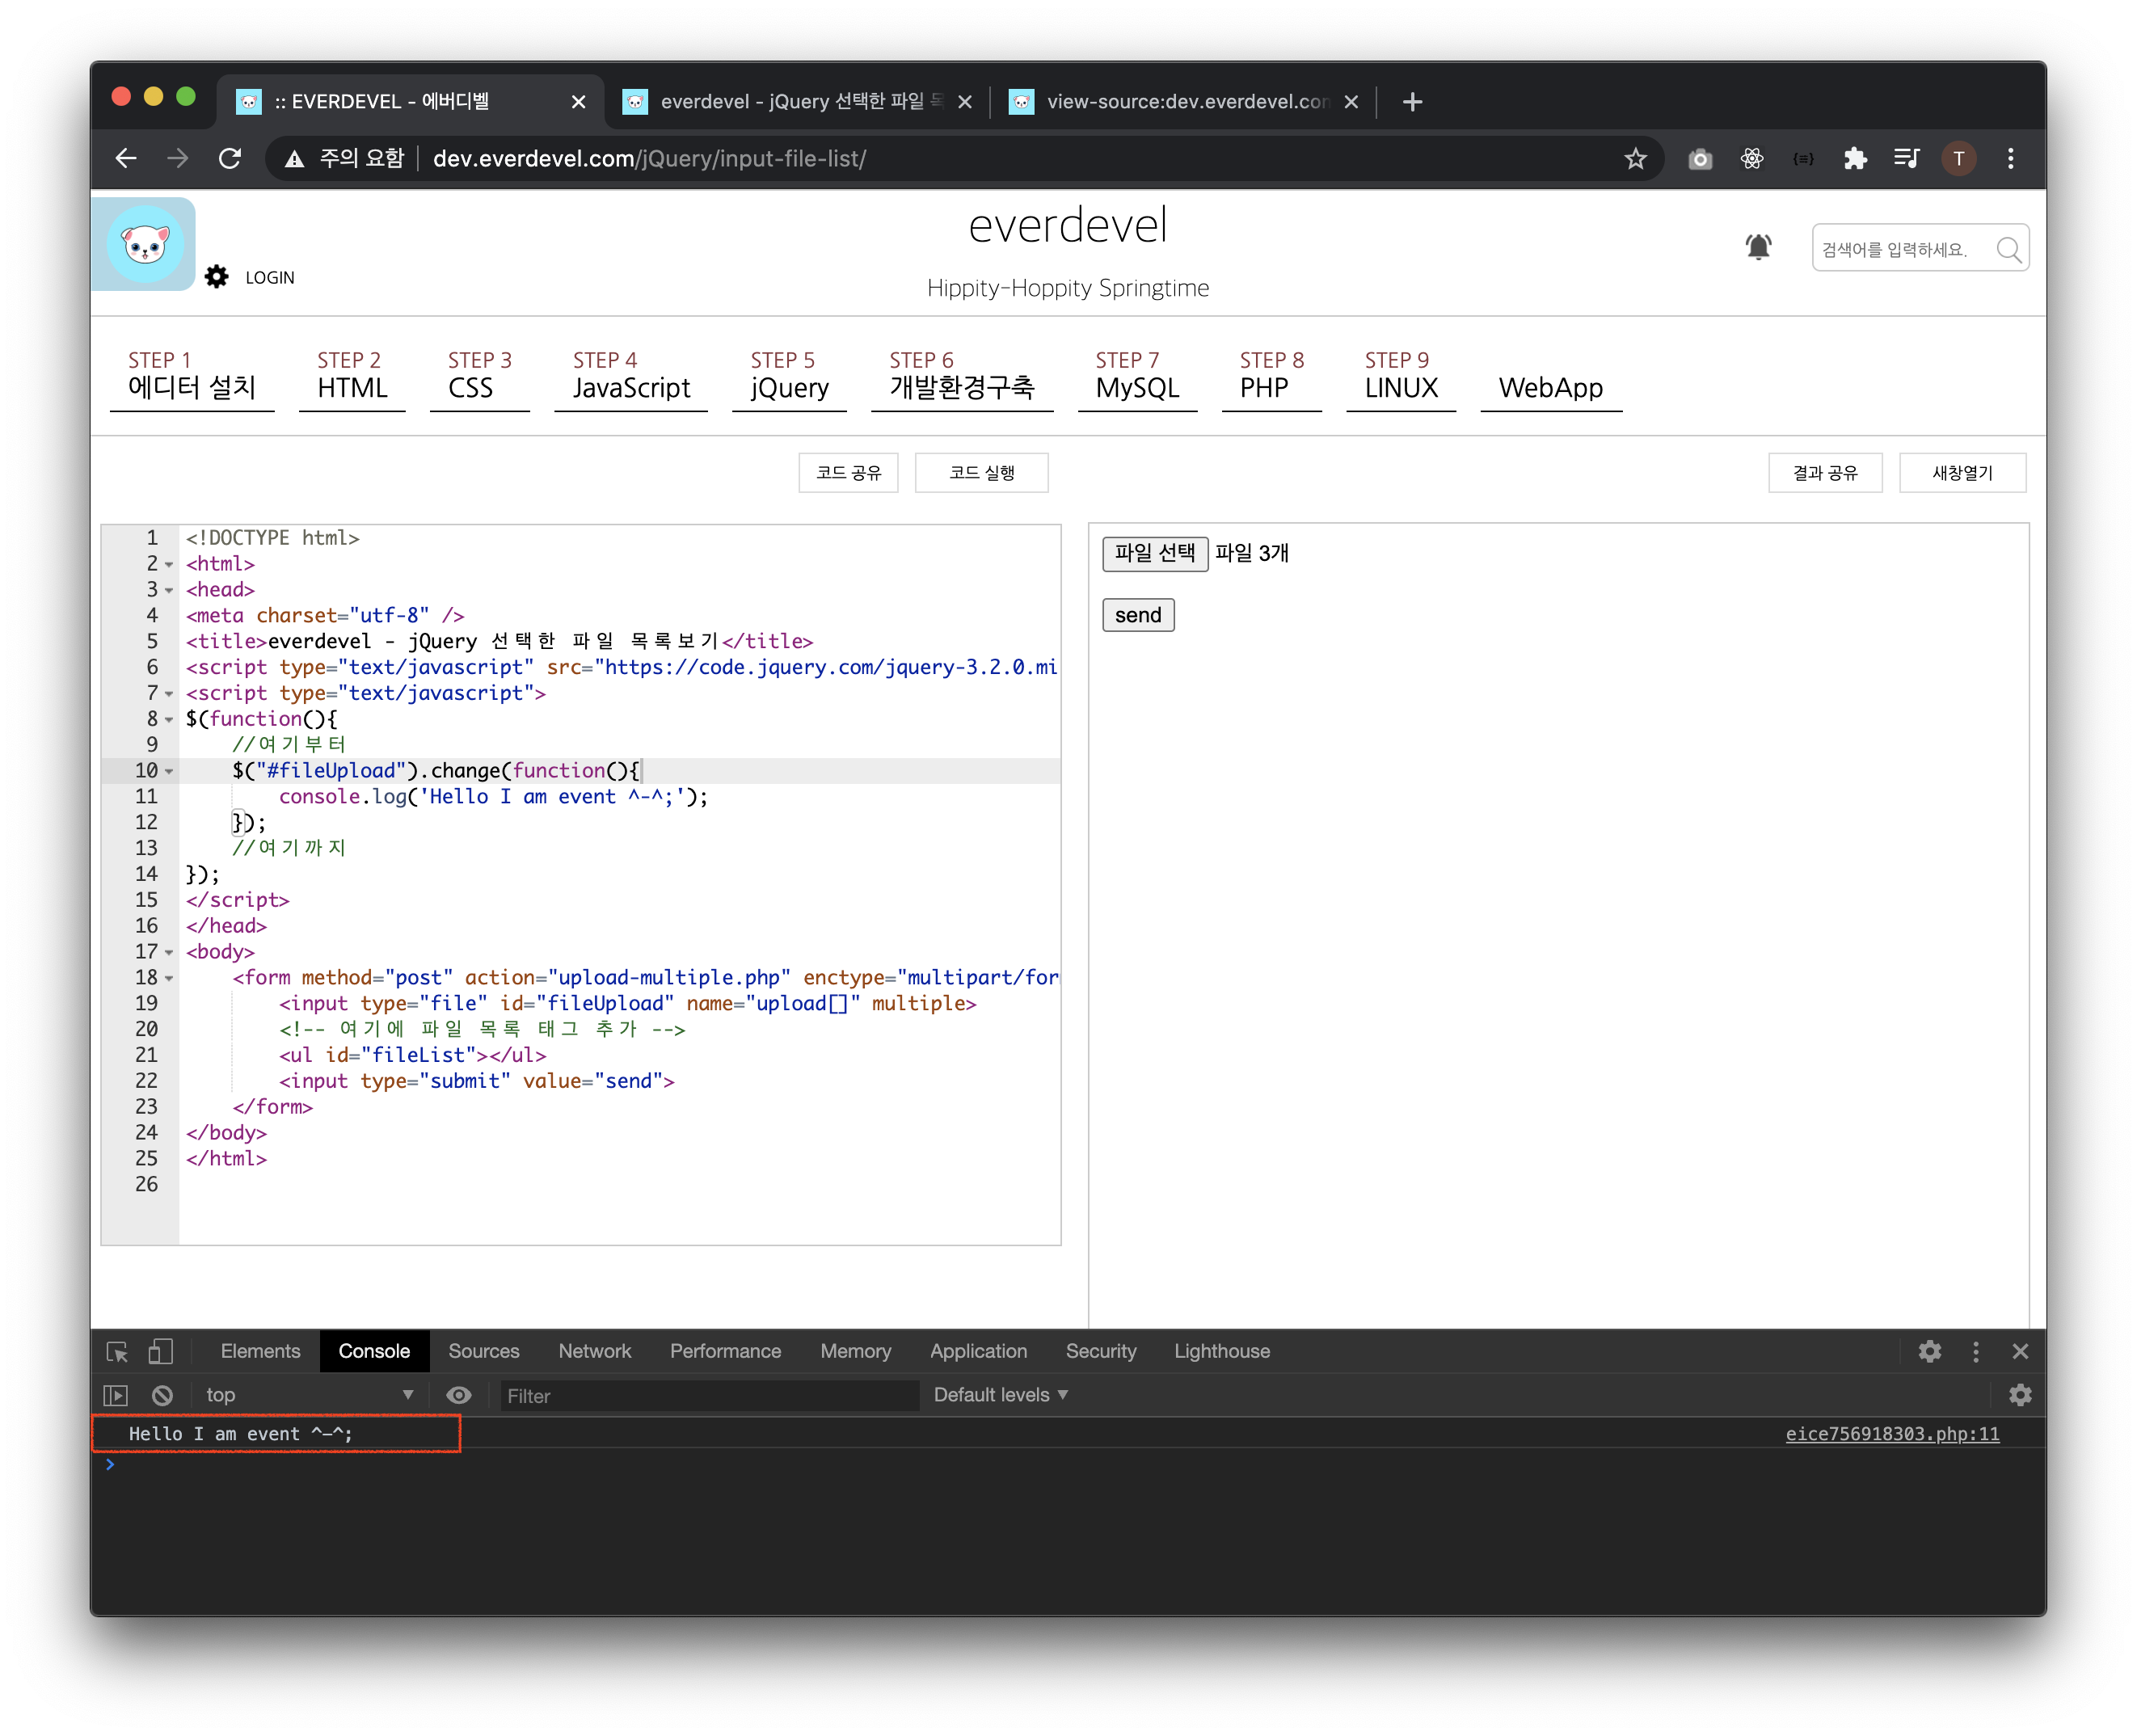
$("#fileUpload").change(function(){
    console.log('Hello I am event ^-^;');
});
자 우선 여기까지 해보고 결과를 봅시다.
참고로 위에 콘솔로그를 사용했죠? 그러니 크롬에서 command + option + i 를 눌러서 개발자 모드를 켜고 콘솔탭을 누르세요. 윈도우에서는 f12를 누르면 개발자 모드가 켜질거에요.
위의 코드들을 적용하면 아래와 같습니다. 실행해 보세요. ^^
<!DOCTYPE html>
<html>
<head>
<meta charset="utf-8" />
<title>everdevel - jQuery 선택한 파일 목록보기</title>
<script type="text/javascript" src="https://code.jquery.com/jquery-3.2.0.min.js" ></script>
<script type="text/javascript">
$(function(){
    //여기부터
    $("#fileUpload").change(function(){
        console.log('Hello I am event ^-^;');
    });
    //여기까지
});
</script>
</head>
<body>
    <form method="post" action="upload-multiple.php" enctype="multipart/form-data">
        <input type="file" id="fileUpload" name="upload[]" multiple>
        <!-- 여기에 파일 목록 태그 추가 -->
        <ul id="fileList"></ul>
        <input type="submit" value="send">
    </form>
</body>
</html>
결과는 바로 아래에서 확인하겠습니다.
파일을 선택해 보세요. 콘솔창에 Hello I am event ^-^; 가 뜰거에요. 그럼 이벤트가 정상작동하는겁니다.
그럼 콘솔로그에 있는 내용을 지우고 해당 태그에 들어있는 파일정보를 보도록 합시다.
$("#fileUpload").change(function(){
    console.log($("#fileUpload")[0].files);
});
id로 선택을 했지만 [0]을 붙여주세요. 붙이지 않으면 files의 정보가 나타나지 않습니다.
그럼 위의 코드를 적용하고 결과를 봅시다.
<!DOCTYPE html>
<html>
<head>
<meta charset="utf-8" />
<title>everdevel - jQuery 선택한 파일 목록보기</title>
<script type="text/javascript" src="https://code.jquery.com/jquery-3.2.0.min.js" ></script>
<script type="text/javascript">
$(function(){
    //여기부터
    $("#fileUpload").change(function(){
        console.log($("#fileUpload")[0].files);
    });
    //여기까지
});
</script>
</head>
<body>
    <form method="post" action="upload-multiple.php" enctype="multipart/form-data">
        <input type="file" id="fileUpload" name="upload[]" multiple>
        <!-- 여기에 파일 목록 태그 추가 -->
        <ul id="fileList"></ul>
        <input type="submit" value="send">
    </form>
</body>
</html>
결과는 바로 아래에서 확인하겠습니다.
콘솔탭의 FileList 앞의 화살표를 누르면 아래와 같이 이미지 목록이 나타납니다.
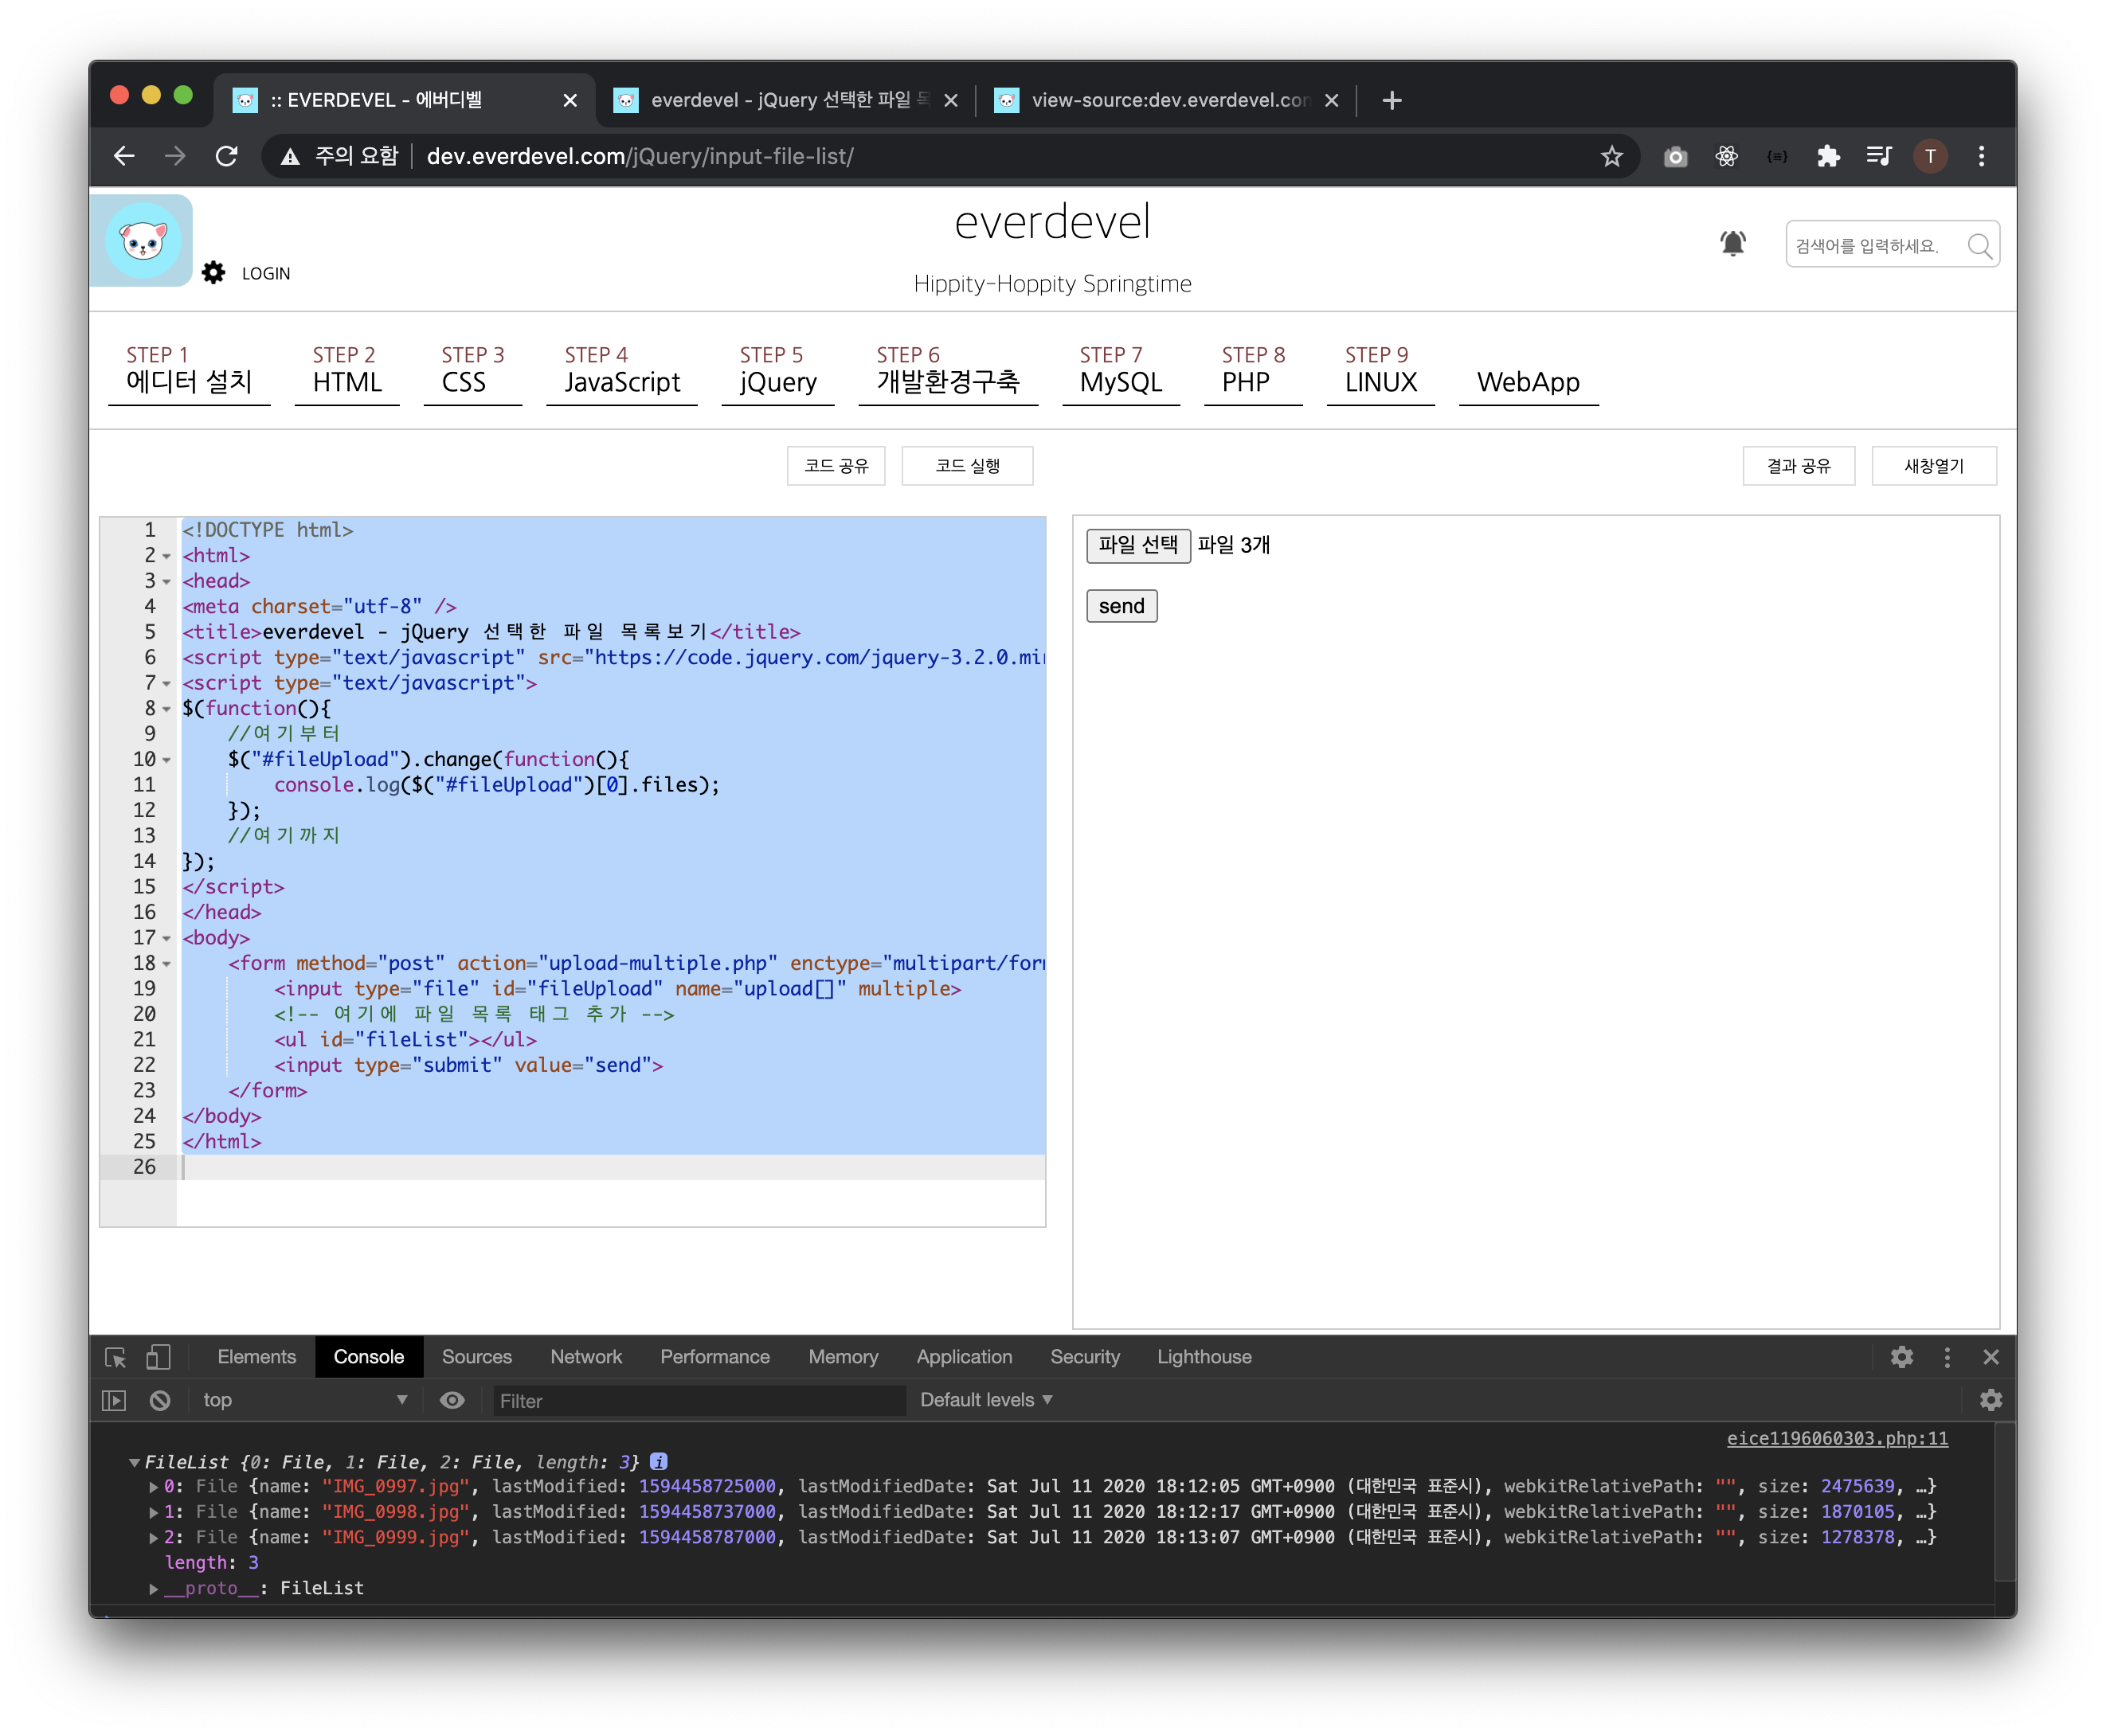
0: File {name: "IMG_0997.jpg", lastModified: 1594458725000, lastModifiedDate: Sat Jul 11 2020 18:12:05 GMT+0900 (대한민국 표준시), webkitRelativePath: "", size: 2475639, …}

1: File {name: "IMG_0998.jpg", lastModified: 1594458737000, lastModifiedDate: Sat Jul 11 2020 18:12:17 GMT+0900 (대한민국 표준시), webkitRelativePath: "", size: 1870105, …}

2: File {name: "IMG_0999.jpg", lastModified: 1594458787000, lastModifiedDate: Sat Jul 11 2020 18:13:07 GMT+0900 (대한민국 표준시), webkitRelativePath: "", size: 1278378, …}
위와 같이 데이터가 나옵니다. 앞의 0,1,2는 각 정보의 인덱스이고 name에 보면 이미지 파일명이 있습니다.
이 데이터를 ul태그에 넣겠습니다.
다음과 같이 구현을 했습니다.
$("#fileUpload").change(function(){
    fileList = $("#fileUpload")[0].files;
    fileListTag = '';
    for(i = 0; i < fileList.length; i++){
        fileListTag += "<li>"+fileList[i].name+"</li>";
    }
    $('#fileList').html(fileListTag);
});
자 그럼 최종 소스는
<!DOCTYPE html>
<html>
<head>
<meta charset="utf-8" />
<title>everdevel - jQuery 선택한 파일 목록보기</title>
<script type="text/javascript" src="https://code.jquery.com/jquery-3.2.0.min.js" ></script>
<script type="text/javascript">
$(function(){
    $("#fileUpload").change(function(){
    fileList = $("#fileUpload")[0].files;
    fileListTag = '';
    for(i = 0; i < fileList.length; i++){
        fileListTag += "<li>"+fileList[i].name+"</li>";
    }
    $('#fileList').html(fileListTag);
});
});
</script>
</head>
<body>
    <form method="post" action="upload-multiple.php" enctype="multipart/form-data">
        <input type="file" id="fileUpload" name="upload[]" multiple>
        <!-- 여기에 파일 목록 태그 추가 -->
        <ul id="fileList"></ul>
        <input type="submit" value="send">
    </form>
</body>
</html>
결과는 바로 아래에서 확인하겠습니다.
봐주셔서 감사합니다. ^^
봐주셔서 감사합니다. 문의 또는 잘못된 설명은 아래의 댓글에 부탁드립니다.
당신의 작은 누름이 저에게는 큰 희망이 됩니다.

컨텐츠의 내용을 더 보려면 바로 아래에서 확인할 수 있습니다.
컨텐츠
더보기
댓글 0개
정렬기준